Do-it-yourself whitewash the ceiling - select the material, prepare it and apply
Repair, especially capital and design - is a very expensive business in time, finances and the state of the nervous system. In the vast majority of cases, for the implementation of high-quality repairs, special knowledge and skills are needed, so you can’t do without hired labor in any way.
Do-it-yourself whitewashing of the ceiling is not difficult work, and is possible for any man and even woman. Therefore, if you decide to only slightly “refresh” the existing interior (cosmetic whitewashing, painting “woodwork”, minor repairs, etc.), it is quite realistic to save on workers' pay. Actually, with the whitewashing of the ceiling, it all starts, and it will be discussed.
Ceiling cleaning and preparation
Before whitewashing, the surface of the ceiling must be properly prepared, that is, remove the layer of old whitewash. This task is technically uncomplicated, but very laborious and “dirty”. Therefore, first of all, everything that is possible and what cannot be taken out of the room should be tightly "packed" in polyethylene and made sure that there are no gaps. The doorway must also be covered with polyethylene or a damp cloth.
Now we need the following:
- soap solution;
- sponge;
- a brush with a natural pile or a large brush;
- putty knife;
- small pallet.
We prepare a solution of warm water and laundry soap. When the solution is ready, we begin to wet the surface with a brush. No need to wet the entire ceiling immediately. While you clean one small area, the rest of the surface will dry out and you will have to wet again. It is most convenient to treat the surface with "squares".
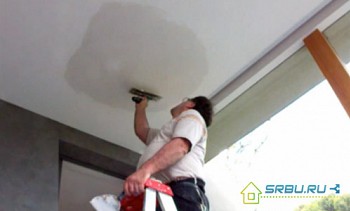
We clean off the whitewash with a hard spatula. At the same time, it is very desirable to hold the pallet with the other hand, where pieces of whitewashing will crumble. So you minimize the "dirty" part of the procedure.
Having thus processed the entire surface of the ceiling, we proceed to the “fine” wash. To do this, we wet the sponge in soapy water and wash off the remains of the old whitewash step by step.
Video. How to remove whitewash from the ceiling
Choose material for whitewashing
By and large, there are three materials for the usual whitewashing of the ceiling: chalk, lime and water-based paint. Consider their advantages and disadvantages.
a piece of chalk
+ Benefits: cheap, easy to apply, “breathes”.
- Disadvantages: due to micro shedding, it becomes an additional source of dust, “smears”, is afraid of moisture.
Lime
+ Benefits: cheap, easy to apply, almost no "smears", "breathes", has bactericidal properties.
- Disadvantages: can greatly reduce the humidity in the room, irritate the mucous membranes, it is rarely perfectly white.
Water-based paint
+ Benefits: sold in a ready-to-use form, it gives an almost perfectly uniform shade of surface, is resistant to abrasion, and is easy to use.
-Disadvantages: “Does not breathe”, significantly more expensive than chalk and lime.
In general, we can confidently say that a "water emulsion" from a practical point of view is an ideal option, but you decide in any case.
Solution preparation
Whitewashing the ceiling with water-based paint involves the purchase of a ready-made solution, with which there is no need for any additional manipulations. And chalky or calcareous solutions for whitewashing need to be prepared. We describe the process in detail.
Preparation of chalk solution
To get the solution of the desired consistency, it is necessary to dilute the chalk in water in the correct proportions.We will build on the conditional 10 square meters. m surface.
On this area you need to take 5 liters of warm water and 3 kg of chalk. Chalk before this must be sieved. Pour chalk into the water, add 15-20 grams of blue and 30 grams of wood glue. Mix thoroughly.
Check if everything worked out as it should, you can very easily. To do this, dip a smooth metal object, such as a knife, into the solution. If the solution drains from a metal surface, leaving almost no residue, then the chalk is not enough. In this case, add a little chalk and stir, periodically checking the density.
Preparation of lime mortar
Dilute 3 kg of slaked lime in a liter of water. Add pre-soaked salt (500-100 g) and 150-200 g of aluminum alum to the resulting solution. With continuous stirring, gradually add warm water and so bring the volume of the solution to 10 liters.
Methods of applying the solution to the ceiling
Whitewashing can be applied to the ceiling in various ways and means: with a brush, roller, or sprayer (spray gun). Each of the options is good in its own way, but there are nuances.
It is advisable to use a spray gun when you need to paint a really large room. Otherwise, in addition to the ceiling, a lot of “extra” surface will be painted. In most cases, a brush or roller is enough.
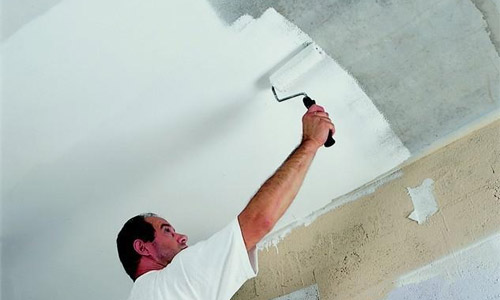
Do-it-yourself whitewashing of the ceiling with a roller has serious advantages over a brush:
- stubble does not climb out of the roller;
- the roller does not give such streaks as a brush;
- significantly saves paint;
- you can do without a stepladder by attaching a roller to a long handle;
- with a roller higher overall performance, especially in large areas.
Nevertheless, a brush will be necessary, since only with its help it is possible to paint over corners and small details with high quality (if any).
Solution application technology
Before whitewashing the ceiling with lime, the surface must first be moistened with a brush. This is done so that the painted surface retains moisture for some time. During this time, the whitewash is carbonized (it will pick up carbon dioxide from the air) and after drying it will become more durable.
The technology for applying all three types of solutions is generally very similar. First, with a brush, paint over the joints and corners, where the ceiling is connected to the walls. Then we proceed to paint the entire surface.
We begin to apply the first layer from the window, and make strokes perpendicular to the rays of light from the window. After being painted to the opposite side of the ceiling, let the surface dry. After that, apply the second layer, but now perpendicular to the first layer of processing. Apply overlap strokes of about 5 cm to eliminate unpainted strips.
As a result, you should get a uniform surface without stains and stains. If you add dye to the solution, do not forget that after drying the shade becomes significantly lighter.
Video. Detailed instructions on how to paint the ceiling with quality

